Wednesday, December 29, 2010

The 5 most bulky programs on your PC


Elephantware. That is what we are talking about. Bloated programs that make brand new PCs boot like Pentium 2s with 64 MBs of RAM.

This is software that causes your screen to free

ze while it works, consumes enough system resources to display a reminder box letting you know there is a new, even bigger, version available for download. Software we’ve been forced to install so we can read some special document format, enjoy some DRM infected piece of media, or communicate with others who also live with the same brand of behemoth riding on their backs.
We all have it. We are all stuck with it. And, aside from a glimmer or two of hope, we can’t expect to escape their boot screens, quick launch icons, or update reminders anytime soon.

This is the worst of the worst.

1. Acrobat Reader
Adobe Acrobat Reader is like a stocky frat guy you never want to invite to your Halloween parties, because he’ll show up wearing a giant gift-wrapped box with a “To: Women, From: God” label on top. He thinks he is all that, but he really just wore a costume so big he can’t get through the front door and has to stay outside by the fire all night (true story!).
Back on topic though, Acrobat reader does one thing poorly — read PDFs. To do this it needs to download updates at least twice a month. Acrobat’s other big feature is the ability to bring your system to a roaring halt while it boots up its massive amount of plugins and libraries. All this to display (wait for it) — a page.
FoxIt Reader is a much better solution. Download it, and you’ll no longer cringe each time your accidentally click on a PDF link while browsing the internet.

2. iTunes
For the love of Apple, why is iTunes such a cow of an application? It is a media player! It should be light and the media should be heavy. Instead we have a bloated and increasingly complex application that takes so long to load, is so ugly, and takes up so much memory the only option is to not use it and pull up Pandora. And let’s not even talk about the painful process of syncing a new iPod using this pile of cowplop.


3. Real Player
Real Player could have been YouTube. Instead it is, well, Real Player. Like a pushy kid on your front lawn trying to sell you a magazine subscription, Real Player just doesn’t leave you alone. It is constantly trying to take over all the media on your hard drive, your web browser, and your MP3 Players. To make matters worse it continuously tries to upsell you on Rhapsody and SuperPass. Yeah, let’s just SuperPass on those options. Thanks.
You might try Real Alternative instead.

4. Internet Explorer
Yes, the great drunk-and-raving-at-family-Christmas-gatherings granddad of bad software. Will Microsoft ever fix this? Sure IE 7.0 is better than IE 6.0, but that is only in a “at least Mussolini made the trains run on time” sort of way. It is still evil. Can’t believe it? Ask any web developer to explain how many hours they’ve spent in the last month getting their site to work in IE and you’ll get the picture.
If you aren’t using FireFox.

5. Microsoft Outlook
Hello Microsoft! Please! It is nearly 2008! How is it possible GMail and Yahoo Mail are so much faster and so much more feature-rich than your flagship mail client? How is it, in the world of 500 spam messages a day, that Outlook becomes pitch-drip slow as soon as you have a couple thousand messages? How is it your business contact manager is always trying to do mysterious things, always failing to do them, and always complaining about it in the middle of startup? And how, oh please tell us how, can you justify a message search that scans a folder at the same speed we do?
Let’s face it, no matter how fast your processor, how big your hard drive, or how many Gigs of RAM you have — your PC will still never run like a gazelle. With junk like the aforementioned software cluttering up your C Drive from day one, you’ll always be stuck waddling along at Winnie-the-Pooh speeds. And if that is too fast for you, perhaps a downgrade to Vista is in order


Know your connection speed


I often find people unsure of the speed of their connection. This is something that we should not ignore as this knowledge helps us compare between plans. Rather than going by what our ISP says it is better if we double-check the speed ourselves. I use the BSNL Dataone broadband which claim to provide a speed of 256 kbps (kilobits per second) and I have found out for myself that this is true :-) . One can check his connection speed by using a nice tool offered by ZDNetIndia. It tests your connection speed and compares it with standard speeds. Make sure that you check this at different times of the day for the connection may be down at some point of time due to some reason or other. Below I have given a screenshot of the test result of my connection.


Net connection speed test

Green Fingers, one of my loyal visitor has given a link for UK users to know there connection speed :
There is a broadband speed test tool available for UK users at http://www.bt.com/broadband/speedtest


10 ways to stop all those irritating calls…


I  found out this funny list to annoy telemarketers. I wonder what if someone actually uses them :
1. After the telemarketer finishes speaking, ask him/her to marry you.

2. Tell the telemarketer you are busy at the moment, and ask him/her if he/she will give you his/her home phone number so you can call him/her back.

3. Ask them to repeat everything they say, several times.

4. Tell them it is dinner time, BUT ask if they would please hold. Put them on your speaker phone while you continue to eat at your leisure. Smack your food loudly and continue with your dinner conversation.

5. Tell them that all business goes through your agent, and hand the phone to your five year old child.


6.Tell them you are hard of hearing and that they need to speak up…louder. ..louder. ..louder!

7. Tell them to speak very slowly because you want to write every word down.

8. If they start out with, “How are you today?”, say “I’m so glad you asked, because no one these days seems to care, and I have all these problems…. ……..”

9. Cry out in surprise, “Helen, is that you? I’ve been hoping you’d call! How is the family?” When they insist they are not Helen, tell them to stop joking. This works especially well if the telemarketer is really MALE.

10. Tell the HSBC call center guy to call on your office number. – and give him the ICICI call center number.


Firefox Tricks


Everybody’s favorite open-source browser, Firefox, is great right out of the box. And by adding some of the awesome extensions available out there, the browser just gets better and better.
But look under the hood, and there are a bunch of hidden (and some not-so-secret) tips and tricks available that will crank Firefox up and pimp your browser. Make it faster, cooler, more efficient. Get to be a Jedi master with the following cool Firefox tricks.
1) More screen space. Make your icons small. Go to View – Toolbars – Customize and check the “Use small icons” box.
2) Smart keywords. If there’s a search you use a lot (let’s say IMDB.com’s people search), this is an awesome tool that not many people use. Right-click on the search box, select “Add a Keyword for this search”, give the keyword a name and an easy-to-type and easy-to-remember shortcut name (let’s say “actor”) and save it. Now, when you want to do an actor search, go to Firefox’s address bar, type “actor” and the name of the actor and press return. Instant search! You can do this with any search box.
3) Keyboard shortcuts. This is where you become a real Jedi. It just takes a little while to learn these, but once you do, your browsing will be super fast. Here are some of the most common (and my personal favs):
  • Spacebar (page down)
  • Shift-Spacebar (page up)
  • Ctrl+F (find)
  • Alt-N (find next)
  • Ctrl+D (bookmark page)
  • Ctrl+T (new tab)
  • Ctrl+K (go to search box)
  • Ctrl+L (go to address bar)
  • Ctrl+= (increase text size)
  • Ctrl+- (decrease text size)
  • Ctrl-W (close tab)
  • F5 (reload)
  • Alt-Home (go to home page)
4) Auto-complete. This is another keyboard shortcut, but it’s not commonly known and very useful. Go to the address bar (Control-L) and type the name of the site without the “www” or the “.com”. Let’s say “google”. Then press Control-Enter, and it will automatically fill in the “www” and the “.com” and take you there – like magic! For .net addresses, press Shift-Enter, and for .org addresses, press Control-Shift-Enter.
5) Tab navigation. Instead of using the mouse to select different tabs that you have open, use the keyboard. Here are the shortcuts:
  • Ctrl+Tab (rotate forward among tabs)
  • Ctrl+Shft+Tab (rotate to the previous tab)
  • Ctrl+1-9 (choose a number to jump to a specific tab)
6) Mouse shortcuts. Sometimes you’re already using your mouse and it’s easier to use a mouse shortcut than to go back to the keyboard. Master these cool ones:
  • Middle click on link (opens in new tab)
  • Shift-scroll down (previous page)
  • Shift-scroll up (next page)
  • Ctrl-scroll up (decrease text size)
  • Ctrl-scroll down (increase text size)
  • Middle click on a tab (closes tab)
7) Delete items from address bar history. Firefox’s ability to automatically show previous URLs you’ve visited, as you type, in the address bar’s drop-down history menu is very cool. But sometimes you just don’t want those URLs to show up (I won’t ask why). Go to the address bar (Ctrl-L), start typing an address, and the drop-down menu will appear with the URLs of pages you’ve visited with those letters in them. Use the down-arrow to go down to an address you want to delete, and press the Delete key to make it disappear.


8) User chrome. If you really want to trick out your Firefox, you’ll want to create a UserChrome.css file and customize your browser. It’s a bit complicated to get into here, but check out this tutorial.
9) Create a user.js file. Another way to customize Firefox, creating a user.js file can really speed up your browsing. You’ll need to create a text file named user.js in your profile folder (see this to find out where the profile folder is) and see this example user.js file that you can modify. Created by techlifeweb.com, this example explains some of the things you can do in its comments.
10) about:config. The true power user’s tool, about.config isn’t something to mess with if you don’t know what a setting does. You can get to the main configuration screen by putting about:config in the browser’s address bar. See Mozillazine’s about:config tips and screenshots.
11) Add a keyword for a bookmark. Go to your bookmarks much faster by giving them keywords. Right-click the bookmark and then select Properties. Put a short keyword in the keyword field, save it, and now you can type that keyword in the address bar and it will go to that bookmark.
12) Speed up Firefox. If you have a broadband connection (and most of us do), you can use pipelining to speed up your page loads. This allows Firefox to load multiple things on a page at once, instead of one at a time (by default, it’s optimized for dialup connections). Here’s how:
  • Type “about:config” into the address bar and hit return. Type “network.http” in the filter field, and change the following settings (double-click on them to change them):
  • Set “network.http.pipelining” to “true”
  • Set “network.http.proxy.pipelining” to “true”
  • Set “network.http.pipelining.maxrequests” to a number like 30. This will allow it to make 30 requests at once.
  • Al
    so, right-click anywhere and select New-> Integer. Name it “nglayout.initialpaint.delay” and set its value to “0″. This value is the amount of time the browser waits before it acts on information it receives.
13) Limit RAM usage. If Firefox takes up too much memory on your computer, you can limit the amount of RAM it is allowed to us. Again, go to about:config, filter “browser.cache” and select “browser.cache.disk.capacity”. It’s set to 50000, but you can lower it, depending on how much memory you have. Try 15000 if you have between 512MB and 1GB ram.
14) Reduce RAM usage further for when Firefox is minimized. This setting will move Firefox to your hard drive when you minimize it, taking up much less memory. And there is no noticeable difference in speed when you restore Firefox, so it’s definitely worth a go. Again, go to about:config, right-click anywhere and select New-> Boolean. Name it “config.trim_on_minimize” and set it to TRUE. You have to restart Firefox for these settings to take effect.
15) Move or remove the close tab button. Do you accidentally click on the close button of Firefox’s tabs? You can move them or remove them, again through about:config. Edit the preference for “browser.tabs.closeButtons”. Here are the meanings of each value:
  • 0: Display a close button on the active tab only
  • 1:(Default) Display close buttons on all tabs
  • 2:Don’t display any close buttons
  • 3:Display a single close button at the end of the tab bar (Firefox 1.x behavior)


Change your login screen


Are you bored of seeing the same blue welcome screen??
Do you want to have a funky login screens like this????


Then here is a way to change the login screen. First download any of the login screens given above, if you dont like the login screen given above you can find hundreds of login screens to chose from here http://themes.belchfire.net/index.php?dlcategory=12

Then extract the .exe file and save it to a directory say login_screen .
Now open the registry editorstart>run>regedit>hkey_local_machine>software>microsoft>windows NT>current version>winlogon

now on the right hand side locate uihostright click that and select modifyand paste the address of the location where u stored your ” .exe file”for example: If u stored the > exe file on the desktop in the directory login_screen n the name of the exe file is 123 then your address would be C:\Documents and Settings\Administrator\Desktop\login_screen\123.exeand your donecheck this by pressing winkey+L

To get back to your old login screen
open the registry editor
start>run>regedit>hkey_local_machine>software>microsoft>windowsnt>current version>winlogon
now on the right hand side locate uihostright click that and select modify
then write “logonui.exe” there (with out quotes)


The other method which some users might find easy is given in “Readme.txt” from the .zip file that you have downloaded.But in most of the cases its not clear what to do for changing logon screen


Change Yahoo Messenger Title Bar


You can change the text that appears at the very top of the Yahoo! messenger window by editing the ‘ymsgr.ini file which is usually located in the messenger folder.

Just follow these steps:

1. Open you yahoo messenger installation folder (default C:\Program Files\Yahoo!\Messenger).

2. Then search a file named “ymsgr“. Double click to open it. If it doesn’t open, then use notepad to open this file.
3. In this file just go to the end and paste the following code in a new line:

[APP TITLE]
CAPTION=Cool Wizard
As you can guess, you can replace the word “Cool Wizard” with any text of your choice. You can have your own name being placed in yahoo messenger title bar.


Now open your yahoo messenger and see the change.
Note: Before trying this tricks make sure to close all instances (windows) of yahoo messenger


How to increase your internet connection speed


If you have Windows XP, try this. Everyone that has tried it says it works, tell us if it works too. You should be logged as Administrator (not even accounts with administrator privileges).
1. Start – Run – type gpedit.msc
2. Expand the Local Computer Policy / Administrative Templates / Network Branch.
3. Highlight the QoS Packet Scheduler in left panel.
4. In right panel double click the Limit reservable bandwidth setting.
5. On setting tab check the Enabled item.
6. Where it says Bandwidth limit % change it to read 0.

The problem is, XP seems to want to reserve 20% of the bandwidth for itself. Even with QoS disabled, even when this item is disabled. So why not use it to your advantage.
To demonstrate the problem with this on stand alone machines start up a big download from a server with an FTP client. Try to find a server that doesn’t max out your bandwidth. In this case you want a slow to medium speed server to demonstrate this. Let it run for a couple of minutes to get stable. The start up another download from the same server with another instance of your FTP client. You will notice that the available bandwidth is now being fought over and one of the clients download will be very slow or both will slow down when they should both be using the available bandwidth. Using this “tweak” both clients will have a fair share of the bandwidth and will not fight over the bandwidth. Try it and tell us if this works.


11 Ways to Minimize Eyestrain


Eyestrain is defined as an eye discomfort that can occur when the eyes tire after a prolonged visual task.

Eyestrain can be manifested by headache or discomfort around the eyes.

Sitting several hours in front of your computers can be eye-straining. If you work at a computer for more then three hours a day you are likely to have symptoms of eye strain. This can be prevented however with these tips provided by Health 24:

1. Ensure that any close-up work or computer screen is not too close to your eyes. As a general rule, view material from as great a distance as possible, provided it can still be read easily.

2. Take frequent vision breaks (at least every hour) to relax your eye muscles. Try closing your eyes and relaxing for one minute. Other useful exercises may include rolling or blinking your eyes, or closing them tightly for a few seconds.

3. Changing focus is another way to relieve the eye muscles. Every 15 to 30 minutes, look across the room or out of the window at an object at least 6 m away, for at least 20 seconds.

4. You can tire your eyes if you have to look frequently between two objects placed at different focus distances. If more than one close-up focus area is needed (when you are using printed reference material and a computer screen simultaneously), keep the viewed objects at the same distance and as close to each other as possible. This helps to reduce focusing changes.

5. Workstations and lighting should be arranged to avoid direct and reflected glare anywhere in your field of vision. Place the computer or TV screen where there is no glare from windows or lights and keep screens clean and dust-free. Use a glare filter on the screen if lighting cannot be modified.


6. Position the top of your computer monitor or TV screen at (or slightly below) eye level so you look downwards at it. This can help with dry eyes. More of the eye surface is covered by the eyelid when you look down, with the result that your eyes blink more and produce more lubrication.

7. Wear sunglasses that reduce glare and provide 100% protection from ultraviolet rays while you are driving or working outside, especially on bright or hazy days. Sunglasses also prevent squinting that may strain eye and facial muscles. If you’re going on a long car trip, stop every few hours to rest your eyes and stretch your muscles.

8. When reading, knitting or drawing, hold your material about 30 to 40 cm away from your eyes. Ensure you have adequate soft light (a 60 to 100-watt bulb) behind you.

9. When using a computer or similar equipment, room lighting should not be as bright as the screen. To reduce troublesome contrast, find a way to darken the area around the screen. Keep your computer monitor in proper focus.

10. While you are watching TV, the room lighting should be about 50% dimmer than the screen. Don’t watch in darkness because this makes the contrast in light too great. Avoid viewing from an angle and sit at a reasonable distance from the TV (about four or five times the width of the screen). In other words, for a 50-cm screen, sit about 2 to 2.5 m away. People with poorer sight may need to sit closer. Children with uncorrected shortsightedness often sit close to the screen in order to see more clearly. An ophthalmologist (eye specialist) can diagnose this condition and prescribe corrective glasses.

11. If your eyes feel particularly dry after any visual activity, try an over-the-counter teardrop product containing polyvinyl alcohol (a wetting agent) or methylcellulose.


Alternative of Alt+Tab in Windows


I am sure all of us will be aware of the Windows shortcut Alt+Tab. It is an application switching shortcut that means every window of opened applications can be switched easily by pressing the combination of buttons Alt+Tab.
What about if this feature is also accessible through your Mouse? I am sure it will be a lot easier and less troublesome. Isn’t it?

Thanks to CyberNet News, I just got an application that is standalone i.e. no installation needed and when you press and hold the left mouse button, and then press the right mouse button, the Alt+Tab application switcher will appear on the screen until you click on one of the icons of the windows that you want to switch to. Don’t forget to release the mouse buttons as soon as you select the window that you want to toggle.
Photobucket

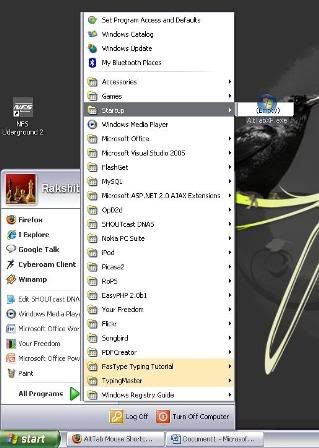
It can also be easily set to start with Windows by placing it in your Startup folder (see picture below) located in the Start Menu. You’ll know this is running when you see the Vista-like orb in the System Tray.
Photobucket

For Windows XP, download here.

For Vista, download here.


How To Manually Backup Your Firefox Extensions


I was really frustrated by this problem. Each time my Windows crashes I lose all my Firefox extensions and themes? I definitely have to come up with something. My regular procedure after re-installing windows is to go the firefox add-ons gallery and search for the extensions and install them one by one. Isn’t it? There is a simple way I came out with, read on.
All the Firefox extensions are compressed and packed in a XPI package. This file can be read by Firefox only. When you click the Install button while installing extensions, Firefox automatically recognizes and runs it, but does not save the XPI file to your computer. So you actually cannot save the extensions in a compact and portable form.

To do so, instead of clicking the install button when on an add-ons page, right click it and select ‘Save Link As’. Select a location and download the file.

A sensible way will be to make a separate folder and backup all your extensions. This way you can install your extensions even when you are not connected to the internet as well as you can send these files to your friends ( in a CD or flash drive )


To install an extension: Open Firefox > File > Open File ( Ctrl + O ). Select your file and push the ok button.

Another way could be that you backup your profiles folder and restore it later on. This will be useful if you want to backup all your settings, extensions, themes etc…
The Profile folder is located here : (in XP)
X:\Documents and Settings\Username\Application Data\Mozilla\Firefox\Profiles\xyxyxyxy.default
When backing up, you will have to replace the original folder with the one you’ve backed up. Although I haven’t tried this method myself, and neither I’m sure it will work. If you know the result, please share with me


Delete Google Search history from Browser, Toolbar, Desktop – Everywhere


Delete all your searches that you have ever made on internet from everywhere to maintain your privacy and protect yourself from intruders. This simple tutorial will guide you to delete search history from internet browsers, Google Toolbar, Desktop Search and from Google servers.

Google stores your web history to suggest popular search words and display relevant ads. If you are working on public computer then, then it is necessary to delete your Google history for your own safety and to maintain your privacy. Following is the tutorial to delete all your history from virtually everywhere:

Delete Search History from Internet Browsers

Whenever you search for some topic, Google search box remembers your last searches and also displays other previous searches that you have made on pressing down arrow button. Generally, it’s your internet browser that stores this data. You can clear this data by browser options.
For Firefox, go to Tools > Clear Private data or Clear Recent History for Firefox 3.5+. To disable recording history permanently go to Options > Privacy tab and select never remember history.
For Internet Explorer, go to Tools > Internet Options. Under General tab, click on Delete from browsing history section to remove all your previous records.
For Google Chrome, Click on Tool icon on right side top and select Clear Browsing History or use shortcut [Ctrl + Shift + Delete].

Remove Search History from Google Toolbar

remove-history-from-google-
Click on the drop down box in Google toolbar. There at the bottom, you will find a link to clear history. Clicking on link will do the work.

Delete History from Google Desktop Search

Right click on Google desktop icon in the task bar and select Desktop Search. Go to Browse Timeline > Web History then click on Remove.
Alternatively, remove entire index from your computer by deleting all the files in the following folder:
C:\Documents and Settings\[username]\Local Settings\Application Data\Google\Google Desktop Search\[some alphanumeric code]

Delete Search History Form Google Servers

Read my previous post on How to remove Web History from Google Servers.

Delete History from Firefox Search Box

delete-search-from-firefox
Right click on the search box in Firefox as shown in picture. Select Clear Search history to remove all previous entries. If you would like to remove only specific entries then click on search box and then press down arrow. Keep pressing it until you highlight desired entry to remove. Now press delete button to clear it. You can perform this action repeatedly to clear multiple search words.


How To Rapidly Delete Messages in Orkut.


One of my good friend fed up with the lot of messages in his Orkut profile which he seldom sees. Most of these messages are community invitations and very rarely some friends forwarded messages.These messages which are useless and annoying can’t be delete them one by one. Obliviously you don’t look at them and keep on ignoring as deleting them consumes lot of time. This greasemonkey script will Delete all the Messages Rapidly.

Works With: Firefox This script work with Firefox. In case you don’t have it installed, you can download Firefox from the right sidebar “Google Pack” if you wish too.

Installation Procedure.


How to Use This Script ?(firefox browser recommended)
- Install Grease Monkey in case you don’t have it Click Here.
- Click on this Script Message Deleter.
- Click on Your Message option as shown above or click here it will start doing it work :)
- In case you have any problems downloading or operating these scripts, contact me.
That is all :0)
Uninstall the Script After Using :
- Go to the Tools of Firefox Browser.
- Go to Geasemonkey > Manage User Script.
- Click Uninstall.


Write Your Name In Heart Shape


Most of the Facebook, Orkut, MySpace users prefer character or ASCII graphics in their profile as they believe pictures speak more than words. This style looks cool and gives a personal touch to the user. Some of the common character graphics include guitar, bike and rose.
One of the most romantic way is to write your name in heart shape. But creating a character graphic is not a easy task. Most people just copy the art and having your own name makes this work more impossible.

This Heart Generator help you to do this job very easily. All you have to do is supply your name and we will create a heart for you. You can use this heart in your profile or you can mail it to your friends.

For Example : The word is BM$$

_________BM$$BM$$____________BM$$BM$$B
______BM$$BM$$BM$$BM_______BM$$BM$$BM$$BM$$
____BM$$BM$$BM$$BM$$BM$___BM$$BM$$BM$$BM$$BM$
___BM$$BM$$BM$$BM$$BM$$BM$$BM$$BM$$_______BM$$
__BM$$BM$$BM$$BM$$BM$$BM$$BM$$BM$$_________BM$$
_BM$$BM$$BM$$BM$$BM$$BM$$BM$$BM$$BM$$_______BM$$
_BM$$BM$$BM$$BM$$BM$$BM$$BM$$BM$$BM$$BM$$______B
BM$$BM$$BM$$BM$$BM$$BM$$BM$$BM$$BM$$BM$$BM$$__BM$
BM$$BM$$BM$$BM$$BM$$BM$$BM$$BM$$BM$$BM$$BM$$BM$_B
BM$$BM$$BM$$BM$$BM$$BM$$BM$$BM$$BM$$BM$$BM$$BM$$B
_BM$$BM$$BM$$BM$$BM$$BM$$BM$$BM$$BM$$BM$$BM$$BM$
__BM$$BM$$BM$$BM$$BM$$BM$$BM$$BM$$BM$$BM$$BM$$B
____BM$$BM$$BM$$BM$$BM$$BM$$BM$$BM$$BM$$BM$$BM
______BM$$BM$$BM$$BM$$BM$$BM$$BM$$BM$$BM$$B
_________BM$$BM$$BM$$BM$$BM$$BM$$BM$$BM$
____________BM$$BM$$BM$$BM$$BM$$BM$$B
______________BM$$BM$$BM$$BM$$BM$$
_________________BM$$BM$$BM$$B
___________________BM$$BM$$B
_____________________BM$$BM
______________________BM$$
_______________________BM


Try making your name in heart shape here.
Similar: Flip your text 180 degrees to surprise your friends from here


Make Best Use Of YouTube New Caching Feature


Recently, YouTube has implemented caching of videos on computers. That means that there is no repeat live-streaming if the video is replayed. This feature is particularly useful for users who have low-speed connections.
In simple terms, once the video is fully buffered in browser (the red bar reaches the end), the video is saved on hard disk of computer. So when you click on replay, the video is played instantly from hard-disk and no buffering is required. Even if you are disconnected from the internet but your browser window remains open, then too you can watch video seamlessly.
Here are few tips to make the most of this newly implemented feature:
  • Increase the default cache size of your browser.
  • For IE6, go to ‘Internet options’ and then to ‘General’ tab. Under ‘Temp internet files’ block click on ‘settings’. For IE7 and IE8, you can increase the cache size by going to ‘Internet options’. Under ‘general tab’ and ‘Browsing history’ block, click on ‘Settings’. For Firefox go to ‘Tools’>’Options’ then ‘Advance’ tab, select ‘Network’ tab under it , there you will find ‘Offline storage block’. Increase from default to somewhere 100-200 MB.
  • If you are using popular utility CCleaner, then don’t forget to uncheck ‘Temp Internet file/Internet cache’, so CCleaner wont wipe out your cached video and you can access then even after browser restart.
  • If you have a slow internet connection then start the video and press pause immediately. Later when you come back to page, it would be available without disruption even if you are disconnected.

Bonus trick

As now youtube videos are cached on your hard disk, you can save them on your computer for offline viewing.

Follow These Steps For Offline Viewing Of Youtube Videos from cached location.
1) Go to your computers cached folder.

For windows XP :

C:\Documents and Settings\[user name]\Local Settings\Temporary Internet Files
Or
C:\Documents and Settings\Administrator\Local Settings\Temporary Internet Files\Content.IE5

For Firefox :

Type about:cache in address bar and hit enter. The last entry on page will give you offline cache device directory.

For Vista IE8 cache location :

%LocalAppData%\Microsoft\Windows\Temporary Internet Files\Low

For Vista IE7 cache location :

C:\Users\[user name]\AppData\Local\Microsoft\Windows\Temporary Internet Files
2) Sort the files with according to size.
3) Large size files between 3 MB to 7 MB are your video files. Another method of identifying them is that they have 11 character name random name.
4) Copy them and save then to desired location.
5) Rename then with extention “.flv”.
6) Hurray! Done. View with VLC or any other flash player


YouTube Office Pictures


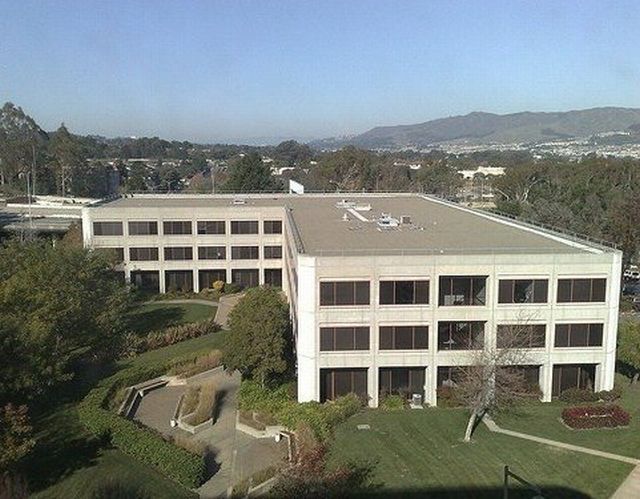
Youtube, was acquired for USD $1.65 Billions in Google stock. Its office space is located in San Bruno, California and is full of facilities. Did you ever wondered how YouTube’s office look like? Here are some workarea photographs :


youtube-office-picture-20
youtube-office-picture-19
youtube-office-picture-18
youtube-office-picture-17
youtube-office-picture-16
youtube-office-picture-15
youtube-office-picture-14
youtube-office-picture-13
youtube-office-picture-12
youtube-office-picture-11
youtube-office-picture-10
youtube-office-picture-9
youtube-office-picture-8
youtube-office-picture-7
youtube-office-picture-6
youtube-office-picture-5
youtube-office-picture-4
youtube-office-picture-3
youtube-office-picture-2
youtube-office-picture-1


Sick of Slow YouTube? Try Feather, YouTube Made for India


Feather, a dedicated YouTube video site from the Google itself was recently launched for those who cannot bear slow loading speed of videos. This test version of YouTube offers “ultra light watch space” which means faster buffering of video and paying less attention to other details like comments and sharing widget.

For years, YouTube had its interest in higher quality videos, HD and even 1080 pixel wide videos (that certainly require higher bandwidth). Nevertheless, YouTube realized that all countries might not have 16MBPS of internet speed and suffer sluggish videos. For us, Indians, even 1MBPS broadband is considered as God’s gift, an extravagant resource. Most of us has to settle for 256 or 512 KBPS. Consider it like watching a 5-minute video, for which you have to wait 10 minutes to load. My workaround to this problem is to open YouTube player and then pause it, as soon as it starts to load. Now come back again after few minutes to find the whole video buffered. And not to forget, use YouTube’s cache to watch repeat videos.
However, Google this time done as a favor by introducing Feather, a TestTube feature. TestTube for Youtube is what a Labs to Google i.e a experiment playground. To use this feature, you need to first join this experiment by going to http://www.youtube.com/feather_beta. Once, you are in the experiment, all the videos that you subsequently watch will feature less flashy content. Watch for yourself, how a feather video looks like in the below image.
youtube-feather-for-slow-videos
According to Google,
This is an opt-in beta for “Feather” support on YouTube. The “Feather” project is intended to serve YouTube video watch pages with the lowest latency possible. It achieves this by severely limiting the features available to the viewer and making use of advanced web techniques for reducing the total amount of bytes downloaded by the browser. It is a work in progress and may not work for all videos.

So, if you aren’t interested in comments, related videos and other web2.0 flashy content expect video, join this program in http://www.youtube.com/feather_beta and enjoy fast rendered, smooth and less latency videos


How To Reopen Last Closed Tab in Chrome, Firefox And In Internet Explorer


By mistake, a web tab may be closed which is hard to find again. It is a common problem which wastes our time for repeating some complex navigation or research. Following tips will help in recovering lost tabs:

Restoring most recent closed tab in Firefox:

All the recent closed tabs can be viewed through the menu History > Recently Closed Tabs. Much faster way to reopen only last tab is using keyboard shortcut Ctrl+Shift+T . Keep holding down Ctrl+Shift and press T repeatedly for reopening upto last 10 closed tabs.

Restoring most recent closed tabs in Google Chrome:

A new tab in Google Chrome displays list of recent three closed tabs at bottom right sidebar. However to view more recent closed tabs and other information about them either go to Tools > History or used keyboard shortcut Ctrl+H. Alternate way is to type chrome://history/ at address bar.
Simple and quick way to reopen last closed tab is as same as in Firefox, which is by using Ctrl+Shift+T

Restoring most recent closed tabs in Internet Explorer 6 or 7:

For IE6 or IE7, third party add-on has to be installed. This add-on will reopen last closed tab on pressing Alt+X. [Download IE Open Last Closed Tab add-on]
For IE8, opening a new tab will automatically display list of recent tabs. Else press Ctrl+Shift+H to view History.


Problem with Videos from Netflix Watch Now Ability in Google Chrome


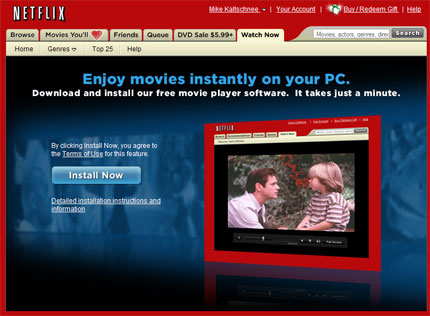
It has been over a year since Google chrome was first released and still various problems persist like watching Netflix videos on Chrome. Here is a quick way to watch instant movies from Netflix.

netflix-watch-now


Officially, Chrome was released on September 2, 2008 and over 3,500 bugs have been fixed till date. One problem that most of the users are facing is using instant play or Watch Now Ability from Netflix. Adobe Flash or Microsoft Silverlight is used to render movies into browser but somehow movies fail to load. You can use the following fixes to watch Netflix movies in Chrome:

1. Make your Chrome behaviour like Firefox

This simple trick will make think Netflix that you are using Firefox browser but actually, you are requesting movie from Google Chrome. For this, you need to add few words in Google Chrome properties.
Go to Chrome icon and right click on it to go to Properties. Find the Target box where you will find the location of Chrome browser. Add the following lines after the Chrome.exe. Make sure to add a space after chrome.exe and below text
–user-agent=”Mozilla/5.0 (Windows; U; Windows NT 5.1; en-US; rv:1.9.0.5) Gecko/2008120122 Firefox/3.0.5 (.NET CLR 3.5.30729)”
OR
2. Make Safari User String for Chrome
Add the following line to tell Netflix that you are using Safari on Mac instead of Chrome:
–user-agent=”Mozilla/5.0 (Macintosh; U; Intel Mac OS X 10_5_3; en-us) AppleWebKit/525.19 (KHTML, like Gecko) Version/3.2.1 Safari/525.19″
If you wish to use Mac version of Netflix player then you can safely use this trick


How To Backup Profiles In Chrome Just Like Firefox


Ever wished to manage your profile in Google Chrome just like in Firefox? Google Chrome Backup is small and free tool to handle profiles effortlessly.

Why backup chrome profiles?
Even though there are slight chances of Chrome not working properly or Windows crashing but there are always possibility for some glitch. You can lose bookmarks, settings, history and other personal data. Google chrome backup will maintain these data for you.
After re-installing chrome, restoring your profile will make it look and work as it was before. You can even have multiple profiles with Chrome using this application.
This tool was built for windows only with .NET 2.0 pre-installed. You must also have Google Chrome version 0.2.149.27 and above to use this backup-manage-restore software.


Google Chrome Backup Pic

This application works for Google Chrome as well as Chromium, [Chromium is portable and open source].Download Google Chrome Backup Software.
Additional Tip:
If you would like to do it manually, then you can copy the chrome profile folder and keep it somewhere safe. Chrome profile folder is User Data under the following location:
In XP – C:/Documents and Settings\[user name]\Local Settings\Application Data\Chromium\
and in Vista – C:\Users\[user name]\AppData\Local\Google\Chrome\


Hotmail Login Problem and Other Errors in Google Chrome : Differnt Solutions


When the Google Chrome first came up and at same time Hotmail Live changed its code, many of us faced “Upgrade your Browser” error. However, clicking on “Continue to Windows Live Hotmail” solved the problem temporary.

windows-chrome-war
New versions of Google Chrome solved this problem but recently Hotmail has started showing up “Error on page” refusing to open or send new mails. This is not a particular Hotmail problem, many other websites have showing such errors lately. Google Chrome is a new browser and still understanding the behaviour of numerous websites. There are still some incompatibility issues, which can be easily solved by following methods:
  • First, you must have latest version of Google Chrome. Download it from here.
  • A sure shot solution:
    1) Click on Wrench menu icon near the address bar.
    2) Select “Clear browsing data” from dropdown. Or press “Ctrl + Shift + DelChrome Keyboard Shortcut.
    3) Select checkboxes “Delete cookies” and “Empty the cache”. Also, select “Everything” from the period dropdown.Finally to remove all history click on “Clear browsing data” button.
  • Another alternate fix is to right click on the Chrome icon, go to properties and adding the following line to target field :
    - -user-agent=”Mozilla/5.0 (Windows; U; Windows NT 5.1; en-US) AppleWebKit/525.19 (KHTML, like Gecko) Version/3.1 Safari/525.19″
This hack will make Hotmail believe that the request is coming from Mozilla agent and will not force you to change internet browser


Cannot Install or Update Chrome – Error, Corrupt or Failed Installation


Sometimes it’s not easy install Google Chrome error free. There are various problems like corrupt installed file (exe) or failed operation at last step of installation. Chrome wont install or gives trouble in updating due to many reasons primary due to network failure, internet connection and corrupt installation.

These Chrome updation or installation problems often arises when you download installer in temp directory, but then these files get deleted by OS. To solve these problems, follow the below steps:
For Google Chrome Fresh Installation:
1) First of all, remove the previous version of Chrome by Add/Remove Programs in Control Panel for windows XP or Programs and Features in Windows Vista.
2) Manually delete some leftover files of Chrome from the following locations:
XP – C:\Documents and Settings\[username]\Application Data\Google\Chrome\
Vista – C:\Users\[username]\AppData\Local\Google\Chrome\Application\
3) Now get a fresh install from Chrome Official site or download the dot(.)exe installation file from here.
chrome-error-install-corrupt

For Updating Previous versions of Google Chrome:

1) Download the portable chrome from here and unzip it in any folder. Now find the file Chrome_Update.exe in the locations told above in step 2 and replace it with the one you have unzipped.
2) Run Chrome_Update.exe from system folder to update Chrome to latest version.That should solve error in updating chrome


Text Formatting in Google Talk


Most instant messengers are very user friendly. They have a toolbar to format your text into different fonts, colors and sizes. You can also convert your important text into bold, italicized or underlined.
Google talk provides some basic features but unexpectedly few things are hidden. I have already told you about hidden emoticons (smileys) in Gtalk and now I will tell you about hidden text formatting techniques in Gtalk.

This feature can be used in both google talk and Gmail embedded chat.

- To type your message in bold, encapsulate it in asterisks (*).
Text before :
google talk trickText after :
google talk hacks
- To italicize any word, write it between two underscores (_).


Text before :
google talk tweaksText after :
gtalk new feature
- Use combination of asterisk(*) and underscore(_) to create a dual bold italicized effect.
Text before :

Text after :


Make Your Own Google Talk Theme


Google talk uses an Jabber protocol, a free open source protocol for communication. Since its open source, all its services are free and customizable. You can even view the code and API provided by Google.
In this tutorial, I will tell you to make your own custom theme for Google Talk. If you aren’t interested in creating your own theme then you can get unofficial themes from http://www.sravi.com/gtheme/download.html and from http://www.googletalkthemes.com/.

Let us start with the Gtalk appearance customization:

1) Searching for Google Talk themes:

%userprofile%\Local Settings\Application Data\Google\Google Talk\themes\system\chat

Copy and paste the above location in the My Computer address bar.
Press Enter and you will see the default location for themes.
2) Create a new folder and name it gtricks.
3) Let us choose theme ClassicPicture because of its simplicity. Go inside the folder ClassicPicture and you will find another folder named Contents. Copy it.
4) Navigate back to gtricks folder. Paste the Contents folder inside gtricks folder.
5) You will discover folder named Resources inside Contents. And inside Resources you will find few more files like main.css, status.html and others.
So your file structure should look like this :
….Google\Google Talk\themes\system\chat\gtricks\Contents\Resources
Next is providing your own background image:
6) Choose a image of size 300×250 which will act as theme background.
(Preferably a lighter color image). Name it aery.jpg .
7) Create a folder inside Resources folder and name it Images.

8) Put image Aery.jpg inside the folder Images.
So resultant cutomized backgroung will be
gtricks -> Contents -> Resources -> Images -> Aery.jpg
9) Navigate back to Resources folder and you will find main.css which specifies the style of theme.
10) Double click to open it and try to locate this code

BODY {
margin: 6px;
}

11) Add background-image: url(“Images/Aery.jpg”); to above BODY class.
now it should look like :
BODY
{
margin: 6px;
background-image: url(“Images/Aery.jpg”);
}
Save it.
12) You are done for the first part. Close Gtalk from the system tray and restart. Go to settings and them appearance to select theme.
If you are familiar with CSS then you can continue editing main.css to modify fonts, colors, text alignments etc.
Here are the file descriptions that might help you :
main.css : This is the main CSS sheet in which you specify the class of styles as you do for HTML.
NextStatus.html : When you chat to someone, their changes in status will use the format specified in this file.
Status.html : When you chat to someone, their status will use the format specified in this file.
Incoming \ Content.html : When you chat to someone, their first reply will use the format specified in this file.
Incoming \ NextContent.html : When you chat to someone, their subsequent replies will use the format specified in this file.
Outgoing \ Content.html : When you chat to someone, your first message will use the format specified in this file.
Outgoing \ NextContent.html : When you chat to someone, your subsequent messages will use the format specified in this file


Computer tricks and Internet hacking Copyright © 2011 | THANK YOU | VISIT AGAIN